


— Blogs —
—Products—
 Consumer hotline +8618073152920
 WhatsApp:+8615367865107
Address:Room 102, District D, Houhu Industrial Park, Yuelu District, Changsha City, Hunan Province, China
Technical Support
Time:2024-08-04 09:50:48 Popularity:2111
There are two main ways to install a tipping bucket rain gauge: ground mounting and bracket mounting. The following are the detailed steps of these two installation methods and their advantages and disadvantages:
Preparation: First of all, you need to make a concrete platform, the height of its exposure to the ground plane is usually not less than 30cm, the size of 40cm long × 40cm wide, to ensure that the upper plane for the horizontal. The height of the rain-bearing mouth from the ground plane should be 70cm.
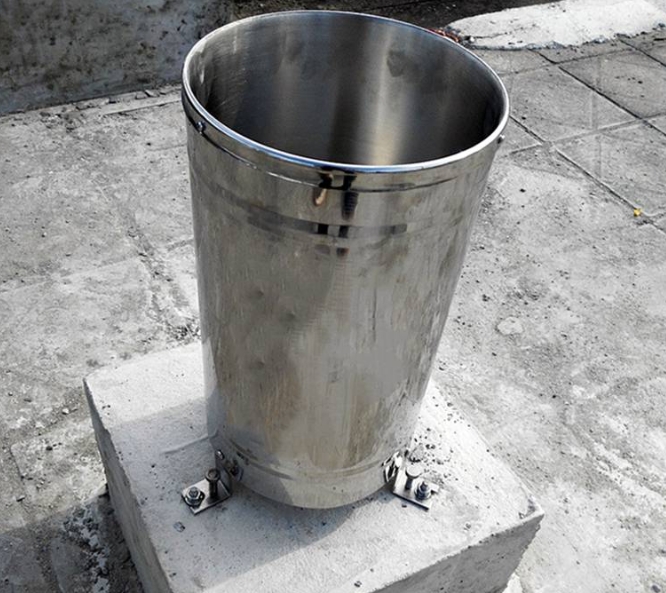
2.1. Make 3 mounting holes of φ12mm in diameter and 8-10cm in depth on the cement table, fix the base of the instrument with expansion bolts and adjust it to the level.
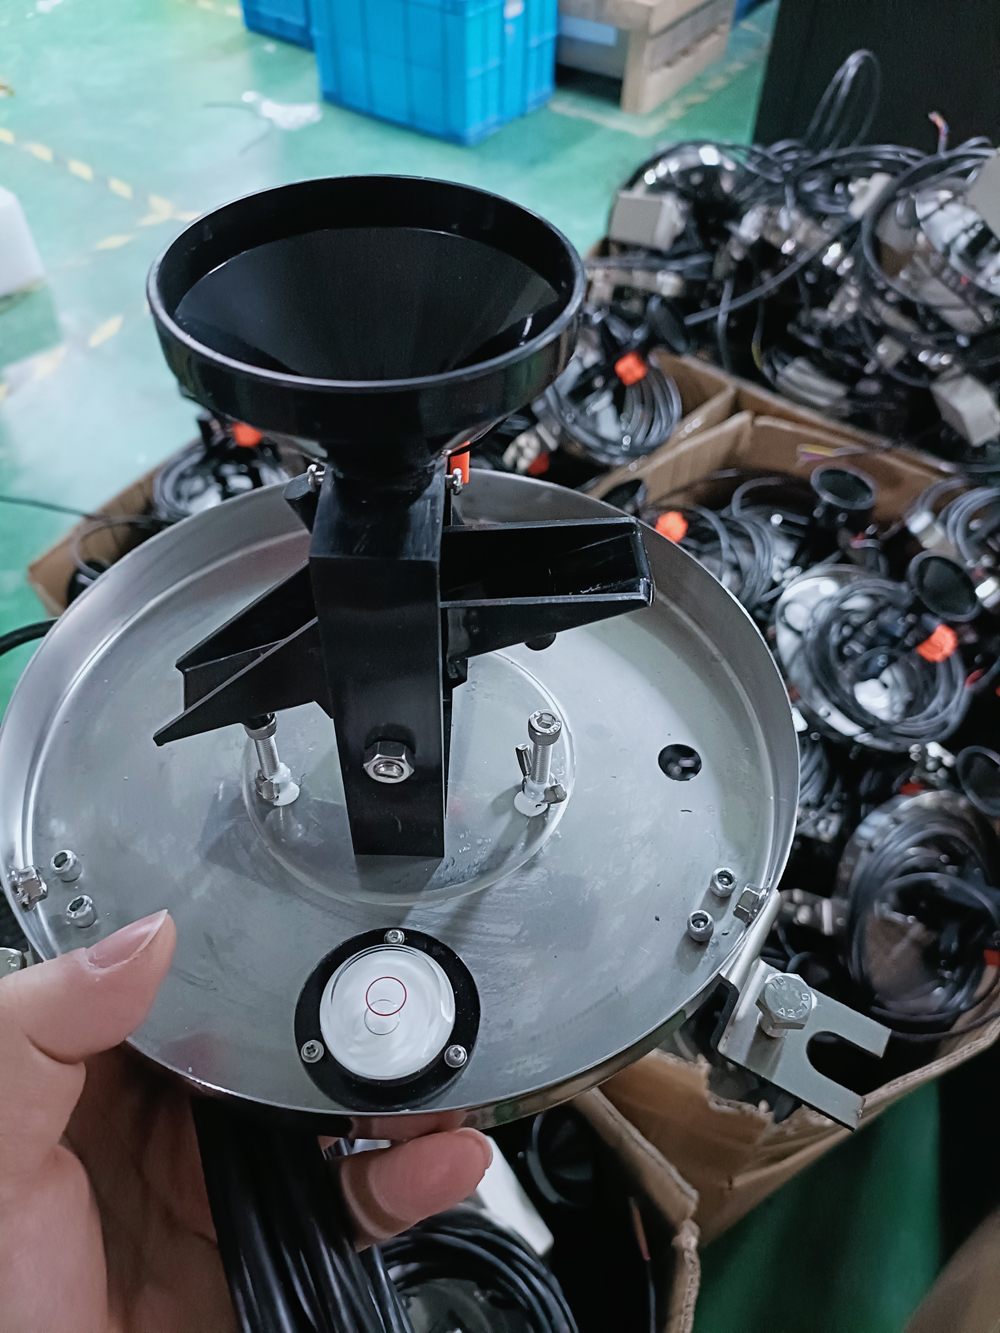
2.2. Adjust the level of the tipping bucket support: remove the stainless steel outer cylinder, check and adjust the level bubble on the tipping bucket support to ensure that the bubble is in the center position. After checking the level of the rain-bearing mouth with a leveling tape, lock the three legs with locking nuts.
2.3. Lead the signal transmission cable from the machine room through the protection pipe to the concrete platform, and then through the base hole to connect with the output terminal.
2.4. Install the tipping bucket, drainage funnel and other components, and adjust the level of the bracket and install the outer cylinder.
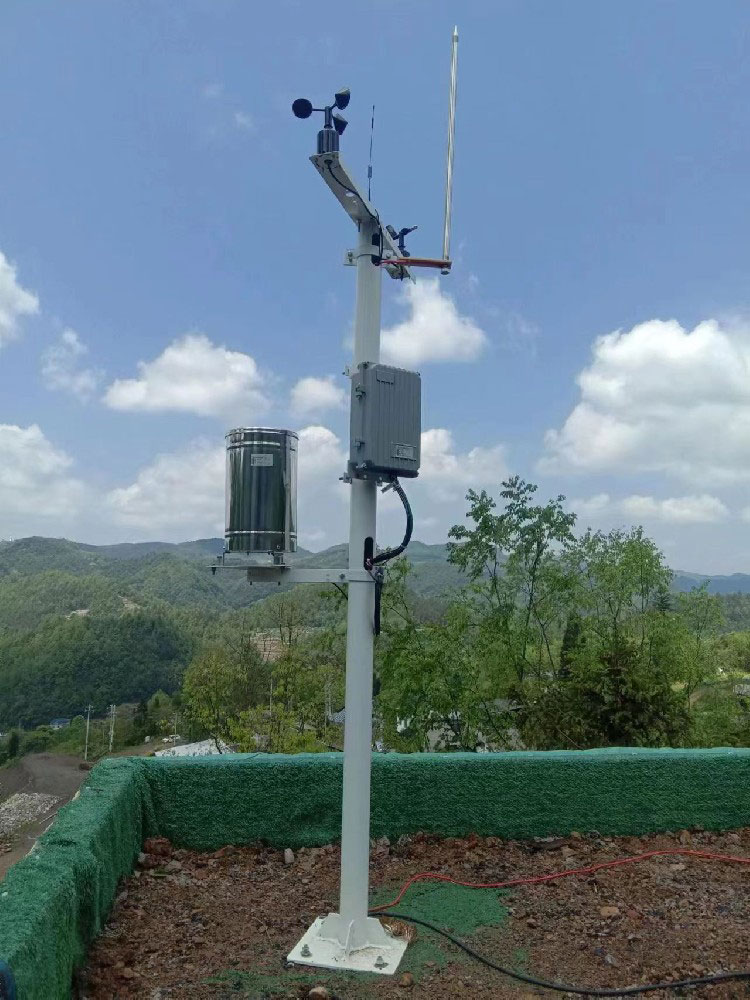
The specific steps for bracket installation may vary depending on the bracket type and design, but the general process includes:
Selecting the appropriate bracket: Select the appropriate bracket according to the needs of the rain gauge and the installation environment.
Mounting the bracket: fix the bracket in the intended position to ensure it is stable and level.
Installing the rain gauge: install the tipping bucket rain gauge on the bracket, connect the signal transmission cable and so on.
Good stability: due to the concrete platform as a support, the rain gauge is more stable and less likely to be affected by external factors (such as wind).
Convenient maintenance: installed on the ground, it is convenient for daily maintenance and overhaul.
Suitable for long-term outdoor use.
Conformity: Standard height (usually 70cm) facilitates uniform data collection and conforms to meteorological observation norms.
2. Disadvantages of ground mounting
Requirements on the ground: need to make a special concrete table, which may increase the installation cost and time.
Affected by environment: Installation on the ground may be more easily affected by environmental factors such as soil moisture and ground settlement.
Environmental constraints: Larger accessible spaces are required to avoid shading and interference.
Immovability: Once installed, it is not easy to be moved to another location unless under special circumstances.
3. Advantages of bracket installation
High flexibility: Bracket installation can be adjusted in height and angle according to the actual situation, adapting to different installation environments.
Lower cost: Compared to above ground installation, bracket installation may not require additional infrastructure such as concrete tables, which is less costly.
Adaptability: in areas with uneven terrain or limited space or areas with special obstacles, the bracket can provide a relatively flat and obstacle-free installation platform.
4. Disadvantages of bracket installation
Relatively poor stability: bracket mounting may not be as stable as ground mounting, and may be easily affected by external factors such as wind, which may affect measurement accuracy.
Maintenance difficulty may increase: If the bracket is mounted in a high or inaccessible location, it may increase the difficulty of maintenance and overhaul.
Installation complexity: Need to ensure the bracket is stable and level, the installation process may be more complicated.
Tipping bucket rain gauge maintenance and care
Regardless of the type of installation, maintenance and care of the tipping bucket rain gauge is critical:
Regularly clean the tipping bucket and the rainfall bearing spout to keep the waterways clear.
Check the flexibility of the tipping bucket to ensure that it can be tipped freely.
When it is not used for a long time, the rainbow should be protected to avoid the entry of foreign objects.

summary
The installation methods of tipping bucket rain gauge include ground installation and bracket installation. The choice of bracket installation or direct installation on the ground depends on the need for flexibility, stability and ease of maintenance.
When choosing the installation method, the use environment, maintenance convenience, stability and cost factors should be considered. Ground mounting is suitable for long-term fixed observation points with high requirements for stability and standardization; while bracket mounting is suitable for environments that require flexible adjustments or space constraints, and offers greater ease of operation and adaptability, although it may be slightly less stable. Either way, ensuring that the rain gauge is level and stable is key to ensuring measurement accuracy.
Prev:Multiple RS485 sensors connected to an industrial router
Next:Sensor data is uploaded to the cloud platform via MQTT protocol
Related recommendations
Sensors & Weather Stations Catalog
 Agriculture Sensors and Weather Stations Catalog-NiuBoL.pdf
Weather Stations Catalog-NiuBoL.pdf
Agriculture Sensors Catalog-NiuBoL.pdf
Related products
 Combined air temperature and relative humidity sensor
 Soil Moisture Temperature sensor for irrigation
 Soil pH sensor RS485 soil Testing instrument soil ph meter for agriculture
 Wind Speed sensor Output Modbus/RS485/Analog/0-5V/4-20mA
 Tipping bucket rain gauge for weather monitoring auto rainfall sensor RS485/Outdoor/stainless steel
 Pyranometer Solar Radiation Sensor 4-20mA/RS485

Screenshot, WhatsApp to identify the QR code
WhatsApp number:+8615367865107
(Click on WhatsApp to copy and add friends)

