
— Blogs —
—Products—
 Consumer hotline +8618073152920
 WhatsApp:+8615367865107
Address:Room 102, District D, Houhu Industrial Park, Yuelu District, Changsha City, Hunan Province, China
Technical Support
Time:2024-05-18 10:15:07 Popularity:880
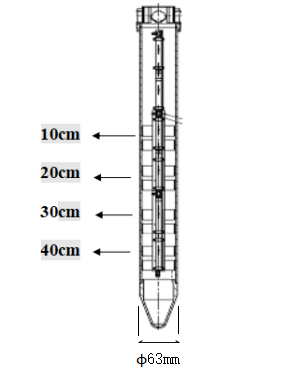
Multi depth soil moisture sensor adopts the principle of FDR, according to the frequency change of the electromagnetic wave emitted by the monitor in different dielectric coefficient substances to measure the humidity of each soil layer, and uses the high-precision digital temperature sensor to measure the temperature of each soil layer. Default at the same time to measure the temperature and humidity of 10cm, 20cm, 30cm, 40cm soil layer, suitable for long-term uninterrupted monitoring of representative soil; can be through the GPRS wireless network to transmit data to the Internet of Things data platform, real-time computer and mobile phone to view the data, convenient and fast, and greatly meets the needs of the use of all aspects.
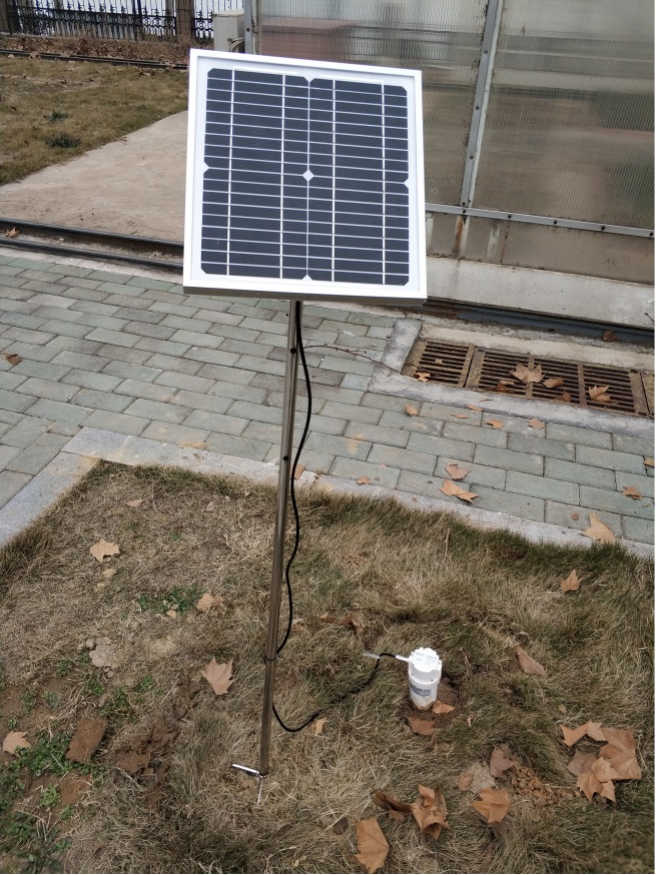
Multi depth soil moisture sensor is lightweight, easy to install, easy to use, accurate measurement and many other advantages. The instrument adopts precision sensors and intelligent chips, and is composed of soil moisture sensor, soil temperature sensor, solar power supply and transmission device.
Moisture monitoring stations (points) should be representative of the main crops and typical soils of the region, and the indicators collected can reflect the actual local conditions.
The deployment of moisture monitoring stations (points) should be comprehensively determined according to the local soil type, planting structure and terrain conditions. Therefore, in principle, the representative plots with the largest representative areas of planting crops and soil types in the region should be selected. In areas with great changes in soil and terrain conditions, topographic and geomorphological conditions and signal requirements for information transmission should also be taken into consideration, and representative plots with flat terrain should be selected as far as possible.
The monitoring facilities need to be set up on one side of the representative plots to reduce the impact on farming; the sensors need to be set up in the soil layer of the farming area, and corresponding ground markers or simple protection fences should be set up around them to prevent collision and damage during farming, but no walls or solid fences should be set up to avoid the loss of representativeness of the plots in which the buried instruments are located by isolating them from the surrounding plots.
Choose to build the station in the plot where the signal such as GSM/GPRS is strong and able to send data SMS message properly and accurately.
The selection and construction of moisture monitoring stations should focus on rain-fed dry farming areas, avoiding the construction of stations in paddy irrigation areas.
The station site should be as far away as possible from woods, tall buildings, roads (railways), rivers, reservoirs and large channels to avoid signal blocking and the influence of water sources.

Multi depth soil moisture sensor installation methods and notes
1、Preparation of tools
Grouting soil drill (or shovel), mud mixing container, mud shovel, movable spanner and so on;
2、Equipment inspection
(1) Packaging inspection: whether there is any damage;
(2) Whether the equipment and accessories are complete;
(3) Whether the equipment (integrated moisture meter, solar panel and bracket) is damaged in appearance;
(4) Equipment power-up check.
3、Equipment list
| No. | Name | Unit | Quantity | Remarks |
| 1 | Multi depth soil moisture sensor | set | 1 | |
| 2 | Grouting and soil extraction drill | set | 1 | Optional |
| 3 | 10W solar panel | set | 1 | Optional |
| 4 | Mounting bracket | set | 1 | Optional |
| 5 | Equipment box | 1 | Optional | |
| 6 | Web Account and Password | 1 | Optional | |
| 7 | Instruction manual | copy | 1 |
4、Pre-installation Preparation
(1) Integration of moisture meter before the installation of the built-in lithium battery for 5 to 6 hours to charge to ensure that the equipment operation power supply;
(2) Plot site selection;
(3) Complete equipment and tools;
(4) Equipment normalcy check;
(5) Ensure that the Pad or mobile phone is on the Internet for on-site data query;
(6) Please read the product instruction manual carefully before installation;

5、Installation Precautions
(1) The holes should be drilled vertically downwards;
(2) The depth of the hole should be increased by 5cm on top of the installation depth to ensure that there is enough space for compressed air at the bottom of the installation;
(3) Drill holes suitable depth;
(4) It is strictly prohibited to hit the moisture meter with heavy objects;
(5) Make sure the switch button of the moisture sensor is on and the instrument is working;
Multi depth soil moisture sensor installation steps
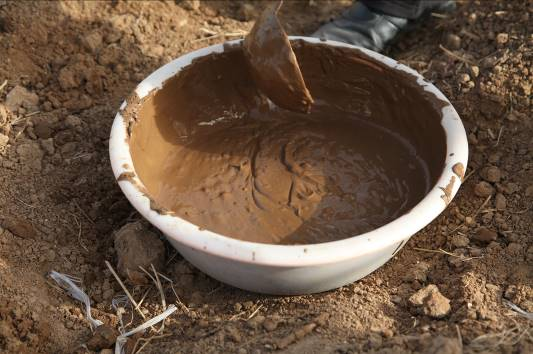
Grouting: The purpose of grouting is to make the installed Multi Depth Soil Moisture Sensor and the soil more tightly bonded without any gaps, so as to ensure the measurement data is more accurate. As the water content of the grout is higher than the actual soil water content, it is necessary to wait for one to two days after the grout is basically solidified before the automatic measurement data can be used.
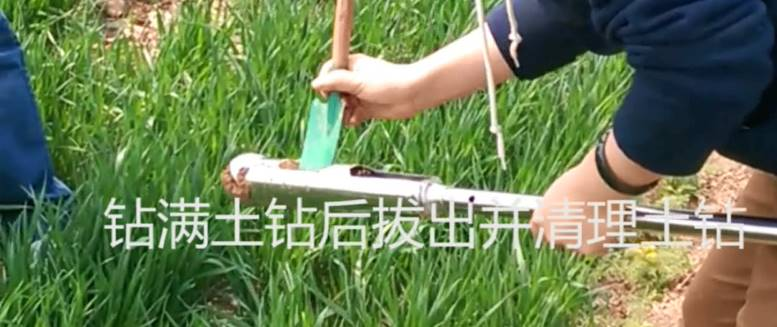
1. Drill the hole with the soil auger, holding the handle with both hands and turning it clockwise with downward pressure;
2. Pull out and clean up the soil auger after drilling the full hole, and repeat the process until the depth is met;

3. Place the transducer into the hole that has been drilled. Placement and removal should be smooth. If it is not smooth, please use the earth auger again to ream the hole where it is not smooth;
4. Prepare the mud, the mud should not be too thin or too thick, pour the mud into the hole, about half of the hole.

5. Insert the sensor into the hole, rotate the sensor left and right, so that the mud is evenly distributed around the sensor; if the sensor is inserted downward in the process, there is damping, indicating that there is air in the mud, at this time, you should move the sensor up and down slowly and rotate it clockwise and anticlockwise, to expel the air.
When the sensor is installed to the appropriate depth (ground plane and sensor 0cm point in a horizontal plane), the installation hole will accumulate around the overflow of mud, the installation is complete;
6. solar panel tilt about 45 ° angle aligned with the south installation, so that it maximises the acceptance of sunlight, bracket installation is completed, the solar panel connecting line on the waterproof plug and moisture meter on the power data interface connection.
NBL-S-TMM-Tubular-Multi-Layer-Soil-Moisture-Sensor-Meter.pdf
Related recommendations
Sensors & Weather Stations Catalog
Agriculture Sensors and Weather Stations Catalog-NiuBoL.pdf
Weather Stations Catalog-NiuBoL.pdf
Related products
 Combined air temperature and relative humidity sensor
 Soil Moisture Temperature sensor for irrigation
 Soil pH sensor RS485 soil Testing instrument soil ph meter for agriculture
 Wind Speed sensor Output Modbus/RS485/Analog/0-5V/4-20mA
 Tipping bucket rain gauge for weather monitoring auto rainfall sensor RS485/Outdoor/stainless steel
 Pyranometer Solar Radiation Sensor 4-20mA/RS485
Screenshot, WhatsApp to identify the QR code
WhatsApp number:+8615367865107
(Click on WhatsApp to copy and add friends)